
Tips for Taking Awesome iPhone Pictures
“The best camera is the one you have with you.” This simply means when the perfect scene pops up, any camera is better than no camera at all. We all know it’s not always possible to carry your bulky DSLR camera with you everywhere you go. It’s also not convenient (and you will likely lose the cute moment) to run downstairs when your little ones do something cute. The iPhone and other smart phones have come a long way with their technology, especially with regards to the camera. You can now take beautiful photos anywhere you go with your iPhone. They do have more limitations than a DSLR camera, but you can still capture great everyday pictures quickly and easily with just your phone. It’s so easy even your mom (or grandmother) can do it! Here are the top 10 tips to take better pictures with your iPhone. Many of these tips can be used with other smartphones as well.
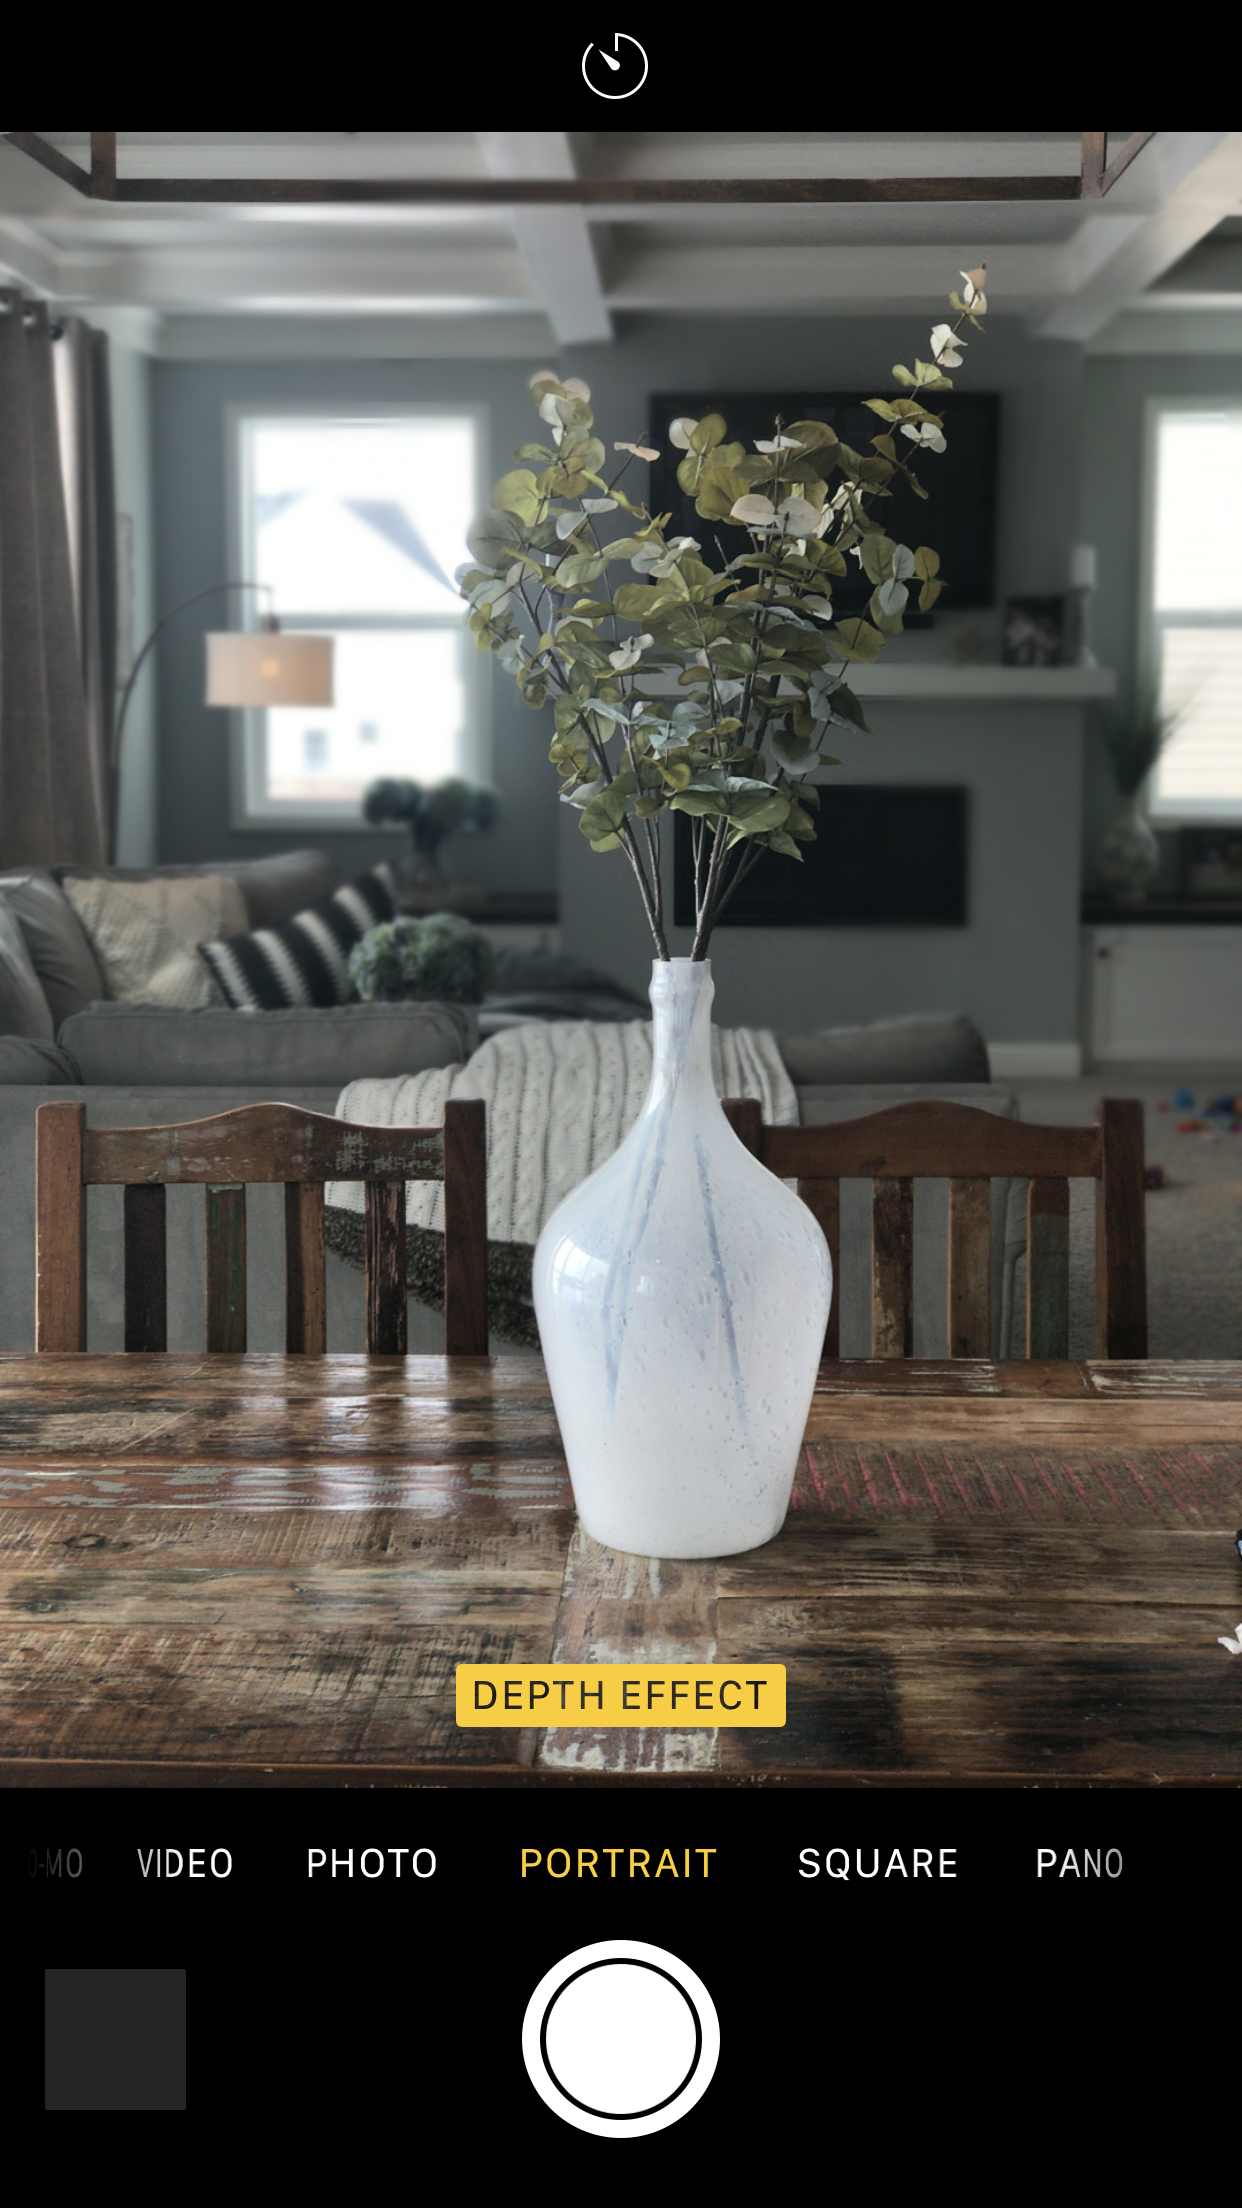
1. Utilize the different shooting modes
When you open your camera app, you will notice different modes across the bottom. This may seem like a no-brainer, but I find most people are only using the photo mode. If you plan to post an image on instagram, try using the square mode so you don’t have to crop later before posting. This will allow you to frame your subject appropriately too. Another mode that I love, is portrait mode. This is only available on the newer iPhone, but it will give you that “blurry background” look (otherwise known as “aperture” when taken with a digital camera). This mode is great, but I do find it challenging with a moving subject (like toddlers), so practice on still objects first!
2. Follow the rule of thirds
Your iPhone camera has a great grid option so you can line up your photos with the rule of thirds. Go to settings->Camera & Phone->enable the “grid” switch.

3. Use the burst mode
This is especially helpful when you are trying to chase your toddler around and capture a great action shot. This is available for iPhone 5 and up. To shoot in Burst mode, just tap and hold down the shutter button (or volume up button). When you are holding the shutter button, you’ll see a counter appear at the bottom of the screen. This lets you know how many shots you’ve snapped.
4. Download some 3rd party applications
This may be more time consuming to take a shot, but you can start utilizing some awesome camera features by downloading some 3rd party manual camera apps. Apple has opened more doors for developers, which means you can experiment with ISO, shutter speed, exposure, etc and take much sharper photos than you could with the default camera app.
5. Turn on the HDR auto option
Do you ever try to take a picture of your subject in front of bright light and getting an end result with your subject being underexposed? Your iPhone comes with a feature called High Dynamic Range (or HDR) that lets you take photos with high contrast light sources. This feature will take multiple pictures at different exposures and merge them together to create a final image that doesn’t distort the light. I turn on the HDR Auto option-it uses info from your cameras sensor to determine if it needs HDR correction. You will see this option at the top of your screen when you open your camera app.
6. Hold down on your camera to lock focus
If you want to lock your focus point or expose your subject correctly, you can tap and hold on the subject in your cameras viewfinder until the yellow AE/AF lock alert pop up on your phone. Doing this enables the automatic exposure metering and automatic focus metering to be locked on your subject. To remove, tap on a different area of the photo.
7. Slide the exposure meter
If you need to brighten or darken your image, click on the subject you wish to correctly expose and slide the sun slider next to the focus square.

8. Use alternate buttons to take the photo
You can use the volume button to snap a photo also. This is usually best to avoid camera shake as well as taking those one handed selfies!
9. Utilize 3rd party editing apps
Take and edit photos like a pro with these simple to use editing apps. Some of my favorites include:
- Camera+ ($3)
- Camera+ provides a wider range of exposure controls and advanced tools such as continuous flash, frontal flash, touch-focus adjustment, 6x digital zoom, a timer, and preset filters. The well-organized interface also makes it a breeze to utilize, whether snapping or sharing shots on social media.
- ProCamera ($5)
- This app hosts sophisticated features for setting exposure time, tint, ISO sensitivity, and more. It even features a night camera and full-resolution previews in addition to robust exposure control and more than 70 unique filters and effects.
- Darkroom
- This app allows you to control everything from hue, saturation, and luminosity (HSL) sliders to curves, but also has a touch of other apps such as VSCO with its integrated filter collections. It has a 4.9 rating out of 5 in the App Store AND it’s free
- Halide ($5)
- This is the perfect camera app for beginners who want to start with automatic and slowly work their way up to manual mode. An automatic mode makes it easy to capture great photos on the fly, but tools like RAW capture and more give ultimate creative control in an easy to navigate app. It even includes portrait effects, such as those touted alongside the latest iPhones.
- Adobe Photoshop express
- Popular Photoshop features such as layers, selection tools, and adjustments all make an appearance, as do options for adding text, applying effects, and blending images. Unfortunately, many features are locked behind in-app purchases, so be ready to spend some dough if Express is your photo editor of choice.
- Adobe Lightroom
- Although many of Lightroom’s tools require a newer model of iPhone to run, it remains one of the most feature-rich apps on our list, particular for photographers who want to edit their workflow while on the move. The app automatically syncs images with its desktop counterpart – whether you’re using images shot on your smartphone or raw images from a DSLR – allowing you to quickly edit, enhance, and share your photos using a variety of familiar tools
- Facetune 2
- Sometimes the images you snap of yourself and your friends are not as flattering as you would’ve hoped. This app allows you to turn your blah selfie into a profile worthy picture. The app allows you to perform specific touch-ups like teeth whitening, blemish removal, and color correction so that your mug looks perfect when you post the pics to your social media profiles.
- Horizon Camera
- Horizon simply forces your phone to record in landscape mode, keeping the feed horizontal even while rotating the phone itself.
- Lifecake
- For the scrapbook lover of the 21st century! The user can view ‘stages’ of their child’s life by selecting and comparing different dates, and decide who can view the albums. The app also allows you to annotate photos or albums.
- Sktchy
- Sktchy is a unique app that allows users to post pictures of themselves for artists to draw or paint.
- Prisma
- Prisma will turn your average photo into a work of art thanks to some help from artificial intelligence and neural networks. Using the various styles of artists such as Van Gogh, Picasso, Levitan, etc, Prisma warps your photos and videos into art.
- Filmborn
- Filmborn was born out of its creator’s passion for film photography. The app features a powerful camera that’s capable of shooting RAW photos with compatible devices.
- Polarr
- Polarr is a photo-editing suite that’s capable of doing almost anything you can imagine to an image. From basic exposure and curves adjustments to photo filters and detailed face-editing tools, Polarr is a great app for photo editing.
- Boomerang
- This is a straightforward editing app that yields fun results. You can shoot small videos that play backward and forwards in a loop. Boomerang adds something different to your Instagram feed.
- VSCO
- An instagram favorite! This app is easy to use and the options for editing your photo are endless. The app allows you to play with the exposure, contrast, and saturation levels of your photo, as well as sharpen, crop, tint, and control the temperature and grain of the image.
- Aviary
- The app has all the tools you could want to begin learning how to edit photos. Aviary has a wide assortment of frames and stickers to choose from.The app also contains overlay, effect, exposure, vignette, focus, blur and text tools to choose from which is why it ranks a spot in our list of the most essential editing tools.
- Pic Frame
- This is a great app when it comes to creating collages. It is pretty effortless to operate and contains an abundance of different collage blueprints to choose from.
- Bokehful
- Bokehful creates the out of focus look to your photos. This application allows the user to draw bokeh effects, play with geometric shapes, and mess with the gradient and opacity of images.